- Remove the dowel pins from the transmission bell housing
- Move the transmission outside in the front yard for cleaning
- Clean the transmission
- Move the transmission back onto the driveway for drying
- Move the transmission into the garage for inspection
- Remove the shifter and top plate to inspect the guts
- Reinstall the top plate hand tight and fit the transmission up to the engine
- Stop and build a "transmission holder" so you don't die lifting the trasmsission
- Manually position the transmission under the truck because it won't fit under the frame while on the rolling "transmission holder"
- Sit cross legged under the truck in a hunched over position and lift the rear (heavy) end of the transmission up ~1 foot high while simultaneously pushing the floor jack under the transmission with your toes. Repeat until you succeed.
- Raise the transmission up and mate it with the back of the engine without being crushed
- Install two bell housing bolts to avoid being crushed
- Measure location of new rear cross member mount and confirm that the transmission will fit.
The engine and transmission both had dowel pins in them, so one set had to go.
The vise grips couldn't get the job done, so they got the heat.
The heat didn't get the job done either, so they got the grinder.
Then the wrench.
The whole process took approximately 30 minutes to get them both out.
Time for a bath with the power washer! I read somewhere that automotive lubricants and solvents are good for the grass.
All better now.
Clutch slave cylinder and throwout bearing inside the bell housing. Both will get replaced prior to final installation.
Shift cover plate removed. It looks like this thing had been oozing oil based on the condition of the transmission exterior. The rubber parts looked like they had seen better days.
Shifter stub.
Underneath the top cover plate.
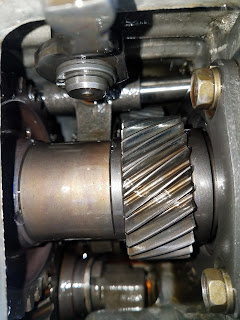
Inside the transmission. Everything feels tight and looks good visually.
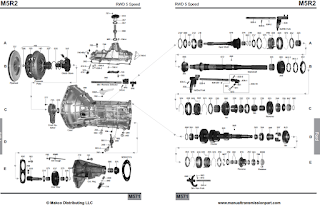
Here is an exploded view of the transmission parts if you are interested:
The magnetic drain plug had the normal amount of metal particulate, but nothing alarming.
After buttoning the transmission back up, it needed to go up there for cross member fit-up.
Floor jack cradle so the transmission didn't fall off and crush me to death.
Cradle zip tied to the floor jack. Safety Tip: When installing a transmission cradle to your floor jack to prevent life threatening injuries, always be sure to use heavy duty zip ties. This is no place to cut corners.
Ready for takeoff!
Still looking good on the way up.
Bolts in and transmission secure. Its pretty tight on the driver's side for the future exhaust pipes...
Looking good from inside the cab. The blue latex glove is covering the open shifter hole. The shift lever should come up to a normal and fairly ergonomic position for the driver.
I had to stop and remove the old automatic transmission mount from the rear cross member.
The good news is that the transmission appears to be in good shape and it fits! It looks like I'm going to also need to modify my existing driveshaft or find a suitable junk yard donor...


No comments:
Post a Comment