Thursday, December 29, 2016

Electrical Wiring Modifications

So, the new steering column is installed and we are on our way.  The old column had an integral key ignition switch, but the new one does not.  This is okay for two reasons: 1) Mounting the switch on the dash is going to look cooler, and 2) the dash mounted switch fits better into the long term plan for the all-electric conversion down the road.

First, the new high torque modern starter motor is capable of switching the full current load when starting unlike old OEM starters, so you can wire them up differently without a starter relay.  This enables me to re-purpose the original starter relay as a master power relay for the whole vehicle.  To do this, I basically moved all of the load side wire connections to the opposite side of the relay from the battery lead.  Configured this way, the truck will be completely dead until the "master switch" is activated on the dash, then power will be available to everything on the vehicle.  The new master switch itself is rated for ~5 amps, which would burn up under the load experienced by the relay.

 To find the correct wire lead under the dash that originally served as the starter switch signal, I made a short hot wire that I could clip to the battery.

 The starter relay activated with a distinctive "thud" when I hit the right pin with the 12V hot wire.
 The new master power switch wiring is pretty straightforward.
 
Here it is!  The new power switch has a modern styling and lights up with a blue LED when activated.  Thinking ahead, this switch will be coupled with a push button starter switch and a RFID key fob just like a modern vehicle.  No old fashioned key on this hot rod...  Just get in the truck, push the start button, and away you go!

Sunday, December 25, 2016

Steering Column Part 3

I spent some time today getting the steering column sorted out.  The new double steering u-joint arrived and fit nicely.  There were lots of small details to attend to, but essentially, I had to orient and align the steering column, steering shaft, and gearbox shaft before tightening all of the bolts.  It took some time to wiggle everything around, but it got done with some intermittent help from child and spouse labor.  :o)

Expensive and hard-to-find stainless CV style steering u-joint:  1" DD x 3/4" 30 spline
 Steering u-joint slipped on to test fit.  Looked pretty good...
 Floor plate slipped on to test fit.
 I marked the shaft where the steering u-joint set screw went.  You only drill through one side.
 Like this:
 One of the set screws hits the OD and the other one goes through the steering shaft and tightens against the ID on the opposite side.
 Loosely installed lower column mount bracket and floor plate.
 Turn signal indicator and tilt lever installed into column along with the steering wheel adapter.
 All tightened up.
 Steering wheel installed minus the horn button.  I left it off since I might be taking the steering wheel back off to make adjustments once the front body panels are installed.  The steering linkage will need to be adjusted, I just don't know how much yet...
 Final orientation of the steering u-joint.  Not too bad in terms of offset/misalignment.
 There was a minor "almost" interference between the exhaust header on the driver's side and the steering u-joint set screw.
 So, I beat a small dent in that primary tube using the same pipe and hammer approach as used before on the lower primary.
 Steering installed, headers installed, and spark plug wires installed!
The next step is to finish some electrical wiring so I can start the engine.

Thursday, December 22, 2016

While we Wait on the U-Joint

While we wait on the new steering U-joint...

The threaded rod that holds down the air cleaner cover has been bothering me for a while, so tonight was the night.

As it was:
 Ready to cut with saws-all:
 Post cutting:
 That's better!

Also, I installed the passenger side exhaust manifold and spark plug wires since there were no steering complications on that side.  I also reconnected the power and ground to the new replacement alternator since I got lazy on that part a while ago.


Wednesday, December 21, 2016

Header Paint

Time to paint the header flanges black.  I used Rustoleum 1,500 degree BBQ pit spray paint on just the carbon steel flanges since the tubes are stainless.  I may get both of them professionally coated in the future, but this will look decent for now while the body is a mess and the focus is on getting the vehicle up and running.

Before cleanup:
 Mostly clean:
 Masked off:
 Mostly complete paint job.
I'll bolt these on once the steering is sorted out.

Steering Column Part 2

All of the parts arrived in the mail and they look good.  After removing the old steering column, I set it next to the new parts and they look pretty similar in form and function.  One concern I had immediately was that the steering u-joints looked larger than anticipated and that the overall length of the assembly looked long.  More on that later...


This is the upper dash mount.  Hats off to Ididit, Inc. for the polishing job on this thing.  I had to scratch it with my fingernail a few times and rub my greasy hands all over it to find the seam where it comes apart.  Made in USA baby!


 The holes in the new upper dash mount did not fit through the existing wiring bracket/sheet metal stiffener, so I had to bore out those holes slightly with a drill bit.


 The column fit into the cab neatly and exited the floor pan as planned, but the steering u-joints had a combined overall length that was too long to fit.  I searched the internet and found a CV style double u-joint assembly that had the correct end fittings and was approximately 2" shorter than these parts, so I ordered it.  The big u-joints are going back to Amazon in the morning...   

 
 Luckily, there are lots of other things to do while we wait for parts.


Saturday, December 17, 2016

Steering Column Part 1

After thinking about it for a while, I decided to replace the existing steering column instead of modifying it to fit the new gearbox configuration.  I would have had to cut and weld on the existing column and ultimately been left with a functional unit that did not look very cool with the Ford factory plastic and the unused/modified column shift features.

As with most other things on this truck, I had to take some measurements and do some research before buying all of the parts online.  Specifically, I had to determine where I wanted the wheel to float in the cab, the spacing distance to the upper dash mount, how far the shaft assembly needed to extend into the engine compartment, and how I was going to couple the new shaft to the gearbox.  The old column was too long to mock up in the configuration it needed to be in, so i got it as close as possible and fudged the measurements slightly to compensate.  The new aftermarket steering columns come in 2" length increments anyway, so it should all work out...  


In the end, I ordered the following:

  • 15" Grant steering wheel with 4" dish
  • Steering wheel adapter mount
  • Ididit 30" tilt steering column - black powdercoat
  • Upper column swivel dash mount 
  • Lower column swivel floor mount
  • Upper steering shaft U-joint, 1" DD shaft x 3/4" DD shaft
  • Steering shaft - 3/4" DD
  • Lower steering U-joint, 3/4" DD shaft x 3/4" spline

Should get them installed next week and continue with the drivetrain work!

Tuesday, December 6, 2016

New Parts

Short post today.  I got some new parts! 

The universal adjustable clutch push rod kit came in for the new pedal assembly:
 
 I got the replacement alternator from CVF:
I technically already had this new firewall cover plate, but it was in a box that came with the body parts and I never opened it until now.  There is some surface rust on it and it looks a little different than the one that is mounted on the truck right now.  I put it back into the box and will sort it out later when it gets time to do the body work.


Saturday, December 3, 2016

Radiatior Fan and Ignition Work

After getting the headers roughed in, I decided to start sorting out more of the electrical issues.  I unboxed and installed the electric cooling fan and stretched out all of the wires to see what I had to work with.  It all looks pretty good except for the fan mounting hardware, which was plastic.  I ran to Ace Hardware and got four new bolts to mount them "properly."  The ignition situation continues to develop... more on that after the radiator pics.

As it was on the truck from before with the protective film from shipping:
 Cheesy plastic mounting hardware for the fan:
 Wires, switch relay, and thermostat:
 Here is the fan laying on top of the fan shroud prior to drilling:
 Drilling hole for mounting bolts:
 Holes drilled and plastic film removed:
 Fan installed to the shroud:
 Shroud mounted to radiator.  Looks good!
While I was working on the radiator, I went ahead and cut the thermostat bypass hose and installed it and the blank cap on the heater return line.  I used a PVC cutting tool to cut the hose so it would leave a nice and clean end on the hose.


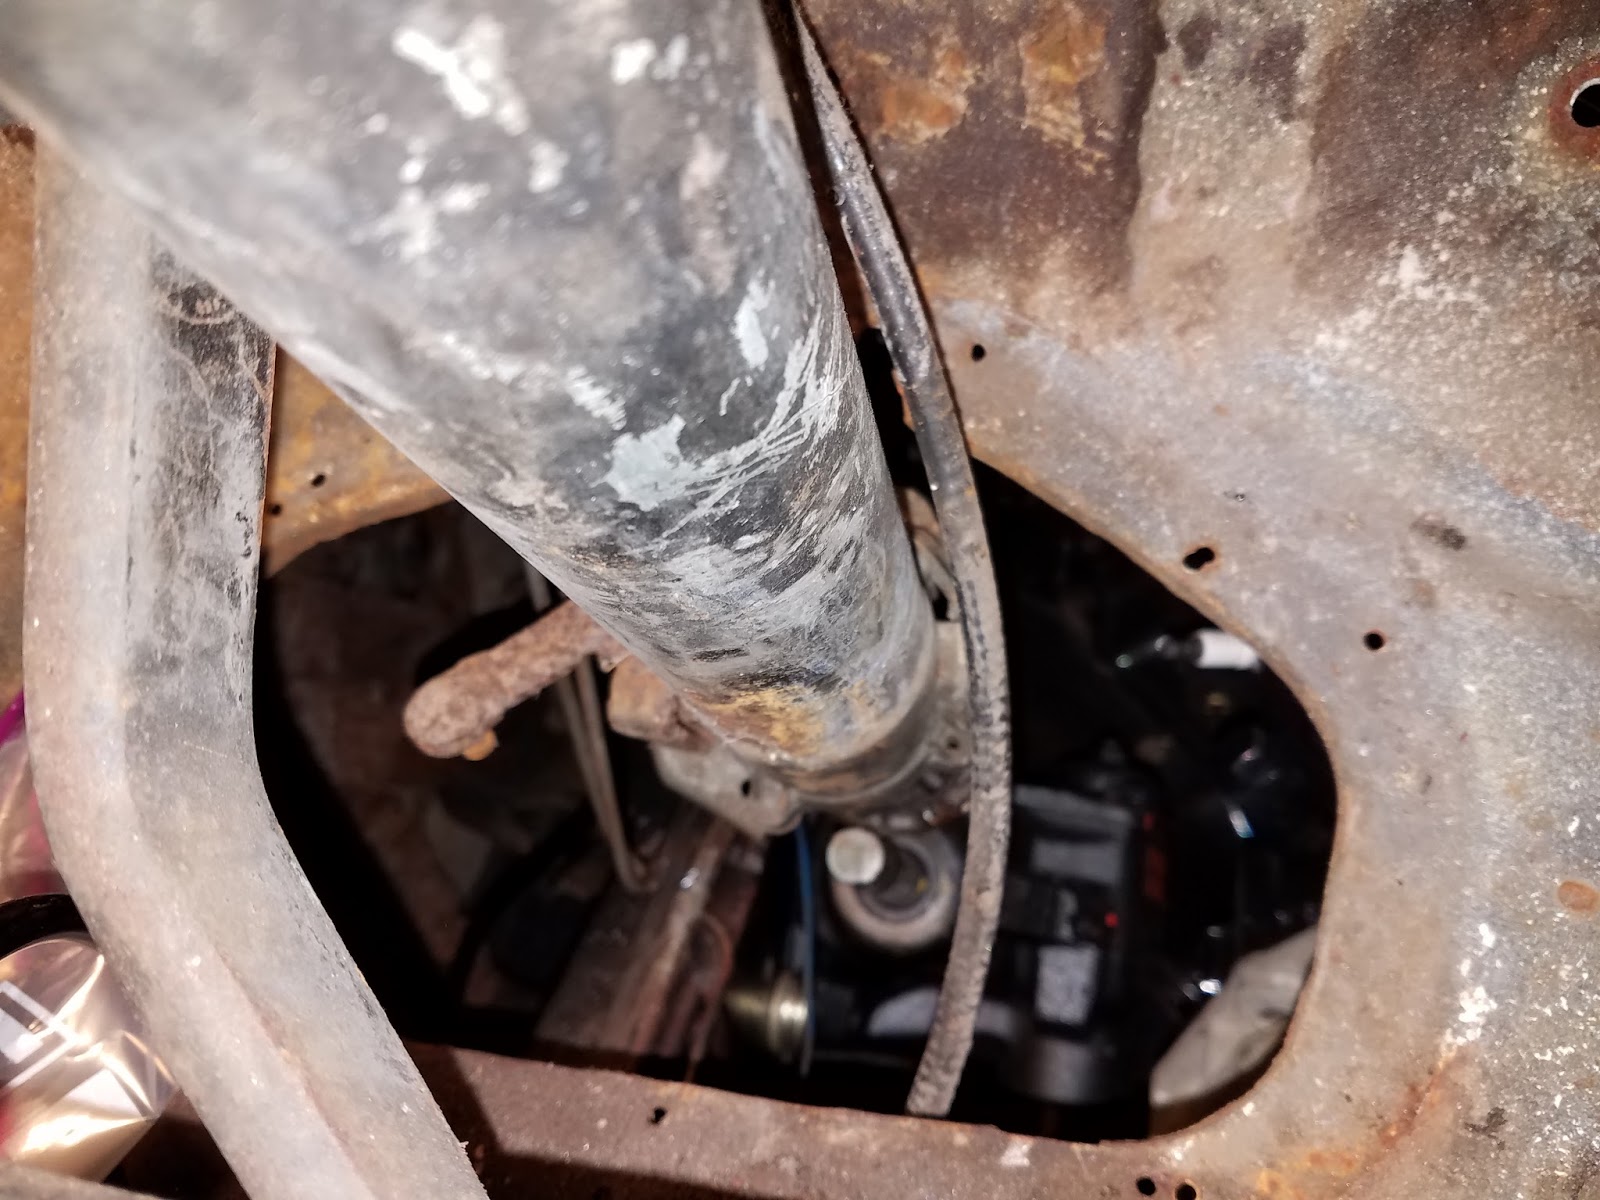
I needed to get the ignition switch replaced before reinstalling the steering column due to the cramped access under the dash.  I also need to get the steering column installed before I can finalize the installation of the driver's side exhaust, so the column has become a priority.  I picked up a replacement ignition switch from the auto parts store and installed it without any issues.  The trouble is, however, that the column will not bolt back up like it did before I put on the new switch (and the steering gearbox).  The mounting bracket now clashes with the dash before the bolt holes become aligned.  After staring at it for a while, my conclusion is that the location of the gearbox input shaft is in a slightly different position than the previous one, which is causing the upper mounting bracket to be off.  I was 50/50 on getting a new steering column anyway since the one on the truck appears to be a Ford factory unit from many decades ago and it is setup for an automatic transmission.  I'll do some research and sleep on it before making a move on a modification of the existing one or new purchase.

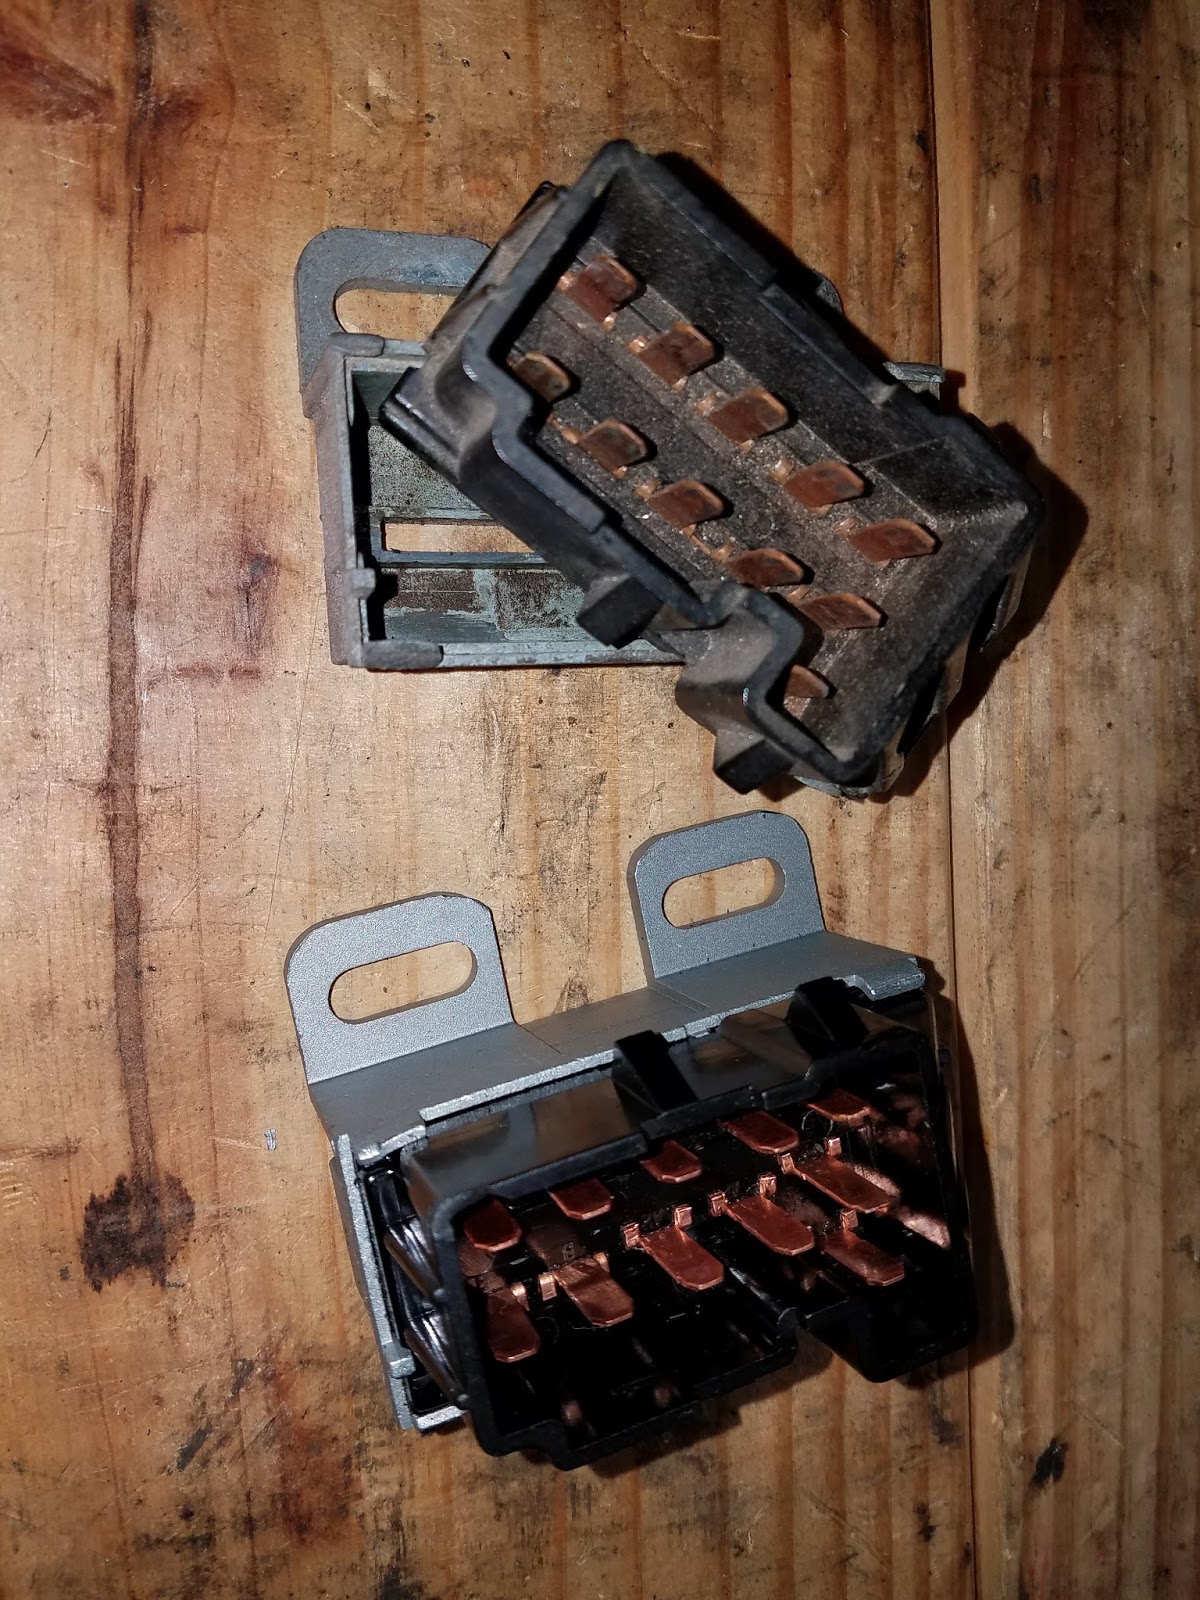
Old blown-up ignition switch:
 Side by side with the new one:
 This is the bracket that is clashing with the dash.  Its aluminum, so I can't bend it like it needs to be because I'm pretty sure it would crack and break.  I'll sleep on it before putting it in the vise...