Friday, December 2, 2016

Header Clearance Remediation

As mentioned previously, the header on the driver's side had a minor clearance issue with the steering gearbox that needed some attention.  After all, the headers don't tell me what to do, I tell them what to do.  Its the natural order of things around here...  This process is difficult to explain in words other than "hit the header with a hammer until it fits," so I have attempted to capture the play-by-play with lots of pictures:

The driver's side header is on the top and the passenger side is on the bottom.  All off-the-shelf headers are made to fit specific vehicles and these are meant to fit a late 60's mustang.  Custom headers can be made to look and fit however you want, but we don't have the time for that kind of luxury on this project.  :o)  These headers are made out of 14 gauge stainless pipes and 3/8" thick carbon steel engine mounting flanges, which are both thicker than what you would find on "value headers."  I ordered a heavy duty set knowing that they would likely need some encouragement to fit on the vehicle.
This is as far as they would go as-is.  There was minor interference on the top corner of the gearbox and likely would be more as they sat down into where they were supposed to go.
 
I gave the steering gearbox bolt a haircut with the angle grinder and it helped the situation a little.
I marked the lower primary pipe with a sharpie and began the slow process of hammering down a local recess.  The second best way to do this is to use a round or curved object that is harder than the pipe you want to bend and hit that instead of hitting the pipe directly to avoid deep scars and tool marks on the header.  The best way to do this is to not do it and make or buy headers that fit your vehicle.  This is truly an art form that requires intense study to do correctly like Michelangelo or Bernini chiseling their great works into marbleI used a cheater pipe and a small sledge hammer to get the job done today while listening to the Jimi Hendrix blues album.
 
I started to encourage the header pipes into the right shape on my workbench that is anchored to a load bearing wall of the house, but there was a whole lotta shakin' goin' on, so I move the operation down the concrete floor.  This was an iterative process, so that means I'd hit the header a few times, walk it back over to the engine, check the fit, then take it back over to the hammer and repeat.  The second picture here shows that the clearance issue started to affect the "upper middle" primary pipe on a different part of the steering gearbox.  So it goes.
 
These pictures don't really do the situation justice as it was hard to get the phone way down at the right angle to take the pictures.  The takeaway here is that both the lower primary tube and the upper middle primary tube have approximately 3/8" clearance around the gearbox.  You can see clear daylight all the way around in person...
 
 This picture shows the clearance between the gearbox input shaft and the header pipes.  I might need to source a short extension joint for the steering column so the bushing will clear the upper pipe, or move the pipe out of the way with the hammer.
 The driver's side looks pretty good now!
 I spent about 1.5 hours on the driver's side and ended up with a sore arm and hands from all the hammer work.  The passenger side mocked up in about 90 seconds without issues.
 
 I'm going to think about the steering column interface over a cold beverage in context with the disintegrated ignition switch issue and decide on how to tackle those problems later.  The next step for the headers is high temp paint on the carbon steel flanges and then final installation onto the engine.


Wednesday, November 30, 2016

Reassembly Day #3

Today was better than yesterday.  I got the new clutch pedal and installed it on the truck, filled the transmission up with fluid, picked up some small hose pieces on the daily run to the auto parts store, and got a special delivery in the mail.  After all of that, I spent a little time cleaning the garage and blew about 15 pounds of grit off the floor with the leaf blower after sweeping up the big debris first...


The clutch pedal came in the mail and it looks pretty good.  I decided to purchase the factory Ford style clutch master cylinder a while ago so I would have the factory setup that came on the transmission donor vehicle, which was a 1990 F150.  In exchange for cheap and available parts down the road, I created the need to drill funky offset holes in the firewall and clutch pedal assembly.  I will also be purchasing a universal adjustable push rod and clevis to connect to the pedal.

Step 1:  Level the master cylinder in the vise and measure.
Step 2: Measure again and then drill the holes in the pedal bracket.


Step 3: Locate, measure, and mark the pedal assembly and master cylinder on the truck.

Step 4: Measure again and then drill the holes.  I did not want to invest $25 in a specific size sheet metal hole bit that I would never use again, so I drilled out a circular hole pattern for the center hole, cut it through with a keyhole saw, and then filed down the rough edges with a rasp bit on the drill.  I saved $25 and worked up a little sweat as a bonus.


Step 5:  Mount the assembly.  I used a motorcycle tie-down to hold the master cylinder in place while I fastened it from inside the cab.  Also, its important not to forget to install the master cylinder mounting gasket to keep water and fumes out of the cab of the truck.  I'm not saying that I forgot or anything, but if someone did forget, they would hypothetically have to get their wrenches back out, disassemble the stuff that they just finished assembling, put the gasket on there, then redo all of that work.  That would be a real bummer if that actually happened, you know.


I reinstalled the passenger side front tire that was removed for engine hoist operations and lowered the truck down so it would be level.  The transmission took a little over 3 quarts to fill using a cheap fluid transfer pump.  It took like 800 pumps to get it all in there...

The heater bypass hose and cap were fit tested and look good.  I'll have to cut the bypass hose down later.


SPECIAL DELIVERY!  - not really, it was Amazon Prime on their normal schedule.  My second set of headers arrived and I believe they are going to work.  The lower primary tube on the driver side is hitting a bolt on the steering gearbox, but other than that, they look great.  It won't take long to make the necessary modifications to get them installed.  The second picture makes it look worse than it is due to the headers not being flush with the engine.
 

Here is a shot of the truck on all fours with a clean-ish garage floor.


Tuesday, November 29, 2016

Reassembly Day #2

Today was frustrating.

It took me way too long to make a new coil wire.  My skills were a little rusty in this department.
 

I spent some time and made another wire for the new Ford mini starter upgrade.  It is a remanufactured starter, so it didn't come with any instructions.  This starter is different from the original antique starters in that it has an integral solenoid and a high torque gear reduction drive.  basically, its smaller and "more better" than the original ones, but you have to wire it up to the truck differently.  A few minutes on the smart phone got that sorted out.


Since I was doing electrical stuff today, I got out the radiator and new electric cooling fan to start sorting it out and planning for the hook-ups.  It turns out that the kit did not come with any fastening hardware, so I had to go out at lunch and buy 16 bolts and nuts.  While I was at Ace Hardware, the tech support guy from CVF alternators called me and told me that he didn't feel good about the part that fell out of the alternator, so he was going to ship me a replacement unit.  Good service, but bad timing on finding out about another problem.


Speaking of fastening hardware, I dug out my radiator support bracket bolting kit that was purchased from Midfifty.com and found a pleasant surprise in the box.  Tootsie Rolls!  A much needed reprieve from the rest of the day's activities. 

The radiator support bracket mounting kit came with a bottom plate and I ordered an extra one to try and cover up the decay on the top of the cross member.  I may tack weld it in place depending on how well the fenders fit-up later.  There was nothing wrong with this part exactly, but I had to keep holding up random body parts to the bracket to try to get it close to where it needed to be, which took too long.  I'll need to drill some new holes through the rubber grommets once everything is located correctly.
 

The radiator is gigantic, which caused me to spend many more minutes on the smart phone looking at internet pictures and checking to make sure I ordered the correct one.  All indications are that it is correct.  It seems even more bizarre looking in person, trust me.


The coup de grĂ¢ce was in the late afternoon.  I had re-wired the starter and ran a new heavy duty 4 gauge wire from the 100 amp 1-wire alternator.  Like the starter, the alternator is a modern upgrade that is "more better," but you have to wire it into the truck different than the factory equipment.  So, with the starter and alternator hooked-up, it was time to crank the engine to check the starter-to-flywheel interface and all of the wiring.  Nothing happened.  After 20 minutes of troubleshooting an otherwise straightforward set of wiring under the hood, I started tracing wires back up under the dashboard.  Its a hot mess under there, but the problem turned out to be that the ignition switch on the steering column broke in half and was not making contact when I turned the key.  I had an old wiring harness in a box that came with the Craigslist purchase of the good body parts, but it was in worse shape than the one currently on the truck.  I jumped the starter over with a hot wire and it appeared to function well.


I gave up after this happened and cleaned the garage for an hour just to feel good about making some forward progress on tasks that did not require parts, wiring diagrams, or playing the "find the disintegrated component" game.

Monday, November 28, 2016

Reassembly Day #1

I'm still waiting on the new clutch pedal assembly to arrive in the mail, so I put that operation on hold and started some of the other pending reassembly tasks today.

I finished bolting-up the rear transmission cross member and installed the new drive shaft.  It fit well and everything looks copacetic.


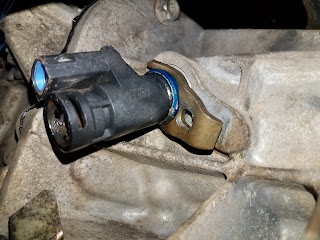
The truck came to me with a C6 automatic transmission, but Ford used the same speedometer gear and cable interface for decades.  The one on the new manual transmission is equipped with a sensor for cruise control feedback, but we don't need any of that on the 56 right now, so I just swapped the speedo gear onto the truck's existing cable and put it back together.  No telling if the speedometer will read an accurate speed with the changes in transmission gearing, but it should function.


The starter was the next easy thing to bolt on, but it turned into a fiasco.  It didn't fit.  Specifically, it didn't fit into the "starter hole" in the bell housing spacer plate.  After two trips to the auto parts store and some internet research, it turns out that some Ford starters differ in diameter by 1/16" across the decades and models.  So, the spacer plate I picked up at the salvage yard a few weeks ago has the smaller hole and the starter I need/want to put on the truck needs the bigger hole.  A bigger hole we got thanks to my trusty Dremel tool and rasp bit for the drill.  I had to vacuum all of the aluminum shavings from inside the bell housing once complete.  This detour was a pain and it killed my productivity for the day.


 I removed the lifting plate from the intake manifold and reinstalled the carburetor:
When attempting to mount the ignition coil on the engine, I discovered that the mounting hole was obstructed when the coil was installed into the bracket, so I had to get the Dremel tool back out and remove a small piece of the bracket.  Nothing is easy like its supposed to be...
 
 
The alternator was next.  I was a little giddy during this part because these parts look pretty sweet.  A small piece of aluminum debris fell out of the alternator when I took the stock fan off, so I called the company and left a message.  It looks like a piece of the outer case, not an electrical component, so it might be okay.  We'll see.  This billet pulley set is powder coated black and is setup for an 8-groove serpentine belt and a trick tensioner.  Totally rad, dude.


Here is where we are so far.